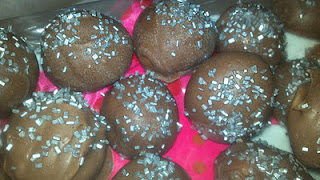
Friday, December 30, 2011

Healthy Treats For Your New Year Resolutions

Everyone always makes new year resolutions to lose weight or eat healthier, here are some delicious looking recipes from Shape magazine that will help you sacrifice the calories without sacrificing taste :).

1) FONUTS:

These are fake doughnuts, they look like doughnuts but they have about half the calories of a real doughnut. This quick and easy treat only takes a bout half an hour to make and makes about twenty four mini doughnuts. Here is the recipe for the Rosemary-Olive Oil Fonuts :).

 Calorie Count: 143 per Fonut (9g fat, 15g carbs, 2g protein, 21mg calcium, 1mg iron, 81 mg sodium) Compare to Dunkin' Donuts at anywhere from 200-500 calories for a full size donut.
                                                                                                                                  Ingredients:
2 Cups of Flour
3/4 Cup of Sugar
2 and 1/4 Teaspoons of Baking Powder
1/2 Teaspoon of Salt
2 Eggs
3/4 Cup of Milk
1/4 Vegetable Oil
2 Tablespoons of Coarsely Chopped Fresh Rosemary
Zest from 3/4 of a Lemon
Juice from 1/2 of a Lemon
1/4 Cup Pine Nuts (for the top of the fonut)

Steps:
1) Preheat your oven to 350 and grease your doughnut pan.
2) Combine the flour, sugar, baking powder, and salt in a bowl
3) In another bowl mix the eggs, milk, oils, rosemary, lemon zest, and lemon juice.
4) Combine the wet and dry ingredients
5) Mix until they are combined (this mixture may be lumpy)
6) Fill each slot 2/3 of the way full.
7) Bake for 10-12 minutes
8) Grind the pine nuts into a powder and place the powder into a shallow pan, when the doughnuts are finished cooking lightly spray the top of them with a cooking spray and dip them into the pine powder.


For more Fonut Recipe's check out Shape's website :).


2) Vegan Cupcakes:

If chocolate is your weakness try out these chocolate cupcakes topped with a healthier version of butter cream.  This recipe makes about 12 frosted cupcakes.

Cake Ingredients:
1 Cup of Almond Milk
1 Teaspoon of Apple Cider Vinegar
1/3 Cup of Vegetable Oil
3/4 Cup of Sugar
2 Teaspoons of Vanilla
1 Cup of Flour
1/3 Cup of Cocoa Powder
1/2 Teaspoon of Baking Powder
3/4 Teaspoon of Baking Soda
1/4 Teaspoon of Salt


Frosting Ingredients:
1/2 Cup of Vegan Margarine (or butter)
3 Cups of Powdered Sugar
2 Chai Tea Bags
2 Tablespoons of Boiling Water
2 Tablespoons of Almond Milk
1/4 Teaspoon of Salt

Cupcake Steps:
1) Preheat your oven to 350
2) Mix the vinegar and the almond milk and let them sit for five minutes
3) Whisk your vinegar almond mixture with the oil, sugar, and vanilla
4) In another bowl sift the dry ingredients together
5) Combine both bowls and mix them together
6) Pour the batter into the cupcake molds and bake for 25 minutes.

Frosting Steps:
1) Beat the butter until it is soft
2) Brew the tea in the boiling water and let it sit for ten minutes
3) Add the almond milk to the tea
4) Next mix the tea with the powdered sugar and the butter
5) Beat for ten minutes
6) For extra flavor try adding some cinnamon to the frosting.

For more on these cupcakes check out Shape Magazine


3) Molasses Cookies:

Yum!!  These cookies look delicious and they have healthy ingredients to help you get your sugar fix while keeping you in shape and on track for your new year goals.  Makes 20 Cookies.

Ingredients:
2 Tablespoons of Ground Flax
1 Egg White
1 Banana
1 Cup of Whole Wheat Flour
1 Cup of Oats (not instant)
1/2 Cup of Blackstrap Molasses
2 Teaspoons of Cinnamon
1 Teaspoon of Ground Ginger
1 Teaspoon of Baking Soda

Steps:
1) Preheat the oven to 350
2) Combine the flax and egg whites
3) Mash the banana in another bowl
4) Add the flour and oats to the banana and mix well
5) Add the flax and molasses and mix until combined
6) Add in the rest of the ingredients and stir well.
7) Scoop rounded spoonfuls of batter onto a baking sheet
8) Bake for 25 minutes


For other healthy cookie ideas scroll through Shape's healthy cookie slide show.


4) DRINKS :)

Celebrate the new year and get a jump start on your resolution at the same time.  Celebrate with a 92 calorie Cranapple Cobbler.  Mix 1 and 1/2 oz of TY KU Liqueur with 1 oz of apple juice and a splash of sugar free cranberry juice.  For other drinks Shape can help give you ideas.


HAVE A HAPPY NEW YEAR!!

Tuesday, December 27, 2011

Mini 3 Tiered Cakes


These haven't been covered in fondant yet just a quick layer of frosting but they are still adorable.  I used a 3 Tier Mini Cake Pan (thanks Mr. and Mrs. Krause! <3)  to make these cakes.  One box of cake mix makes four mini cakes.  They only take about half and hour to bake and they come out of the pan easily.  It's hard to coat the pan in flour and it works well with just a cooking spray but they come out better with a light dusting of flour if you can do it. 

I'll put more up on these when I decorate them in fondant :).

Holiday Gift Ideas


Christmas Treats Sleigh
Fill little sleighs with your favorite holiday themed treats to give as gifts or keep as a center piece for your table :).  If you are giving it as a gift wrap it in cellophane and tie a ribbon around the top of it to give it a finished look.


Bow Cupcakes


These cupcakes are so simple and so cute!  I haven't made them yet but I am definitely planning on making them asap!

Snowmen Cake Bites


Cake bites <3.  Cake bites are cake pops without the sticks, still just as delicious.  I used edible markers to draw their faces and buttons and pink sprinkles for their hats.


To make these treats roll two different sized cake balls (just like cake pops, follow a cake pop recipe).  Dip the largest cake ball into the melted chocolate first and place it on wax  paper, immediately dip the smaller ball into the melted chocolate and place it on top of the larger cake ball.  Now allow it to dry completely.  Once it has completely dried dip just the very top of its head back into the chocolate, then dip the top of its head into a small prep bowl filled with sprinkles.  The sprinkles will only stick to the melted chocolate.  Once that dries you can decorate with the edible markers.

Sugar Sheets and Cake Tattoos


 Playing around with sugar sheets and cake tattoos.
While these are awesome for adding easy designs to your cake I prefer Duff's cake tattoos over Wilton's sugar sheets.  Wilton's sugar sheets are thicker than Duff's cake tattoos so they are harder to stick on the cake.  The cake tattoos are very thin and blend easily into the cake.  

All in all I am not a fan of either product, neither product worked amazing over the fondant.  However if you are only going to frost your cake then I assume (haven't actually tried this so I can't guarantee anything) that the cake tattoos would stick much better, but I still wouldn't recommend the sugar sheets, they were too stiff. I would only use them if I wanted to cut out stiff shapes and put them on top of cupcakes or other little desserts.

:) 

Thursday, December 22, 2011

Doughnut Cookies

These sweet little sugar cookies were so good they didn't make it to the decorating stage :x.  


Using my Babycakes donut maker I decided to make sugar cookies :).  The sugar cookie dough worked perfectly!  As long as you put about two tablespoons (A LOT) of dough in the maker it will make perfect doughnut cookies.


If you want to try this for yourself let each cookie sit in the maker until the edges turn golden brown (about ten minutes) and use the tool that comes with the maker to gently scoop the cookies out (they are very soft when the first come out).  Finally try not to eat all of them before decorating :x.

Chocolate Chip Cookie Dough Truffles


Cookie Dough Truffles YUM <3 :).  

I love the recipe from Recipe Girl's website.  When I make truffles I DO NOT put the chocolate chips inside, I feel like that makes it too sweet and chocolatey (yes there is such a thing as too much chocolate).  The insides are plain "cookie dough" and the chocolate is the coating :).  


The dough is a little sweeter than actual cookie dough and I don't think it tastes nearly as good before it is dipped in chocolate so don't judge it before its dipped.


Next time I make truffles I am going to try the sugar cookie version :).  The sugar cookie version is coated in sprinkles instead of dipped in chocolate and of course has a completely different recipe.  I'll update that one soon <3

Friday, December 16, 2011

Oreo Snowmen


These are the cutest winter cookies and they are very easy to make.  I'll post a how-to-video asap! :) 


Monday, December 12, 2011

Cake Plates


 LOVE LOVE LOVE <3
I can't wait to use these!! They are so cute :)!
Thank you Christmas Tree Shop !


Friday, December 9, 2011

Updates on Marshmallow Fondant

I promised to report back after using the homemade marshmallow fondant and here are my thoughts on it:


At first I thought I was going to love it; it looked nice, it felt better, it tasted AMAZING, but it was extremely difficult to handle.  I'm thinking now that it could be because I only used half the amount of sugar called for in the recipe but it was beginning to dry out with the amount of sugar I had put in.  Oh well, that will be my next experiment.  The biggest problem I had with this was trying to roll it out WITHOUT it sticking to the counter top.  It didn't matter how thickly I coated the counter top with sugar kept sticking, ripping, and needing to be re-microwaved.  Finally I used a thick layer of Crisco to coat the counter, that worked wonders!  All in all I guess I'd try this recipe again and use the full amount of sugar in the recipe, but for important projects I'll stick with store bought fondant :x.

Mickey and Minnie Mouse Clubhouse


Mickey, Minnie, and the bottom of the clubhouse are entirely cake!  The top of the clubhouse is one massive sugar cookie (putting that massive cookie on made me so nervous) :P!  The most exciting part of this cake was that I got to use my homemade marshmallow fondant for some of it.

Happy Birthday Abby and Kyle!!

Wednesday, December 7, 2011

CONTEST!

I have reached my goal of 30 followers!  The contest is on!  Check back on January 1st to see who the winner is :) and what the prize will be! :)  Thanks guys! :)

Thursday, December 1, 2011

Low Cal Strawberry Smoothie


This is a recipe I made myself so I really hope you try it and love it as much as I do.


Calorie Count: 106


Ingredients:
- Ice
- Strawberries
- Smucker's Sugar Free Strawberry Preserves
- Light and Fit Strawberry Yogurt


This will make enough smoothie to fill one large glass, like the one in the picture :).


Start by filling half of your tall glass with crushed ice, then put the ice into a blender to really crush the ice.  Next put in four whole strawberries (obviously cut off the green top first) I prefer Dole's frozen strawberries but it doesn't make a big difference.  (Cal Count: 4 medium strawberries are about 16 calories) Blend the strawberries and ice until there are no big pieces, you want strawberry snow for this part.  Next add 1 tablespoon of the sugar free strawberry preserves (Cal Count: 10 calories from the preserves, totaling so far at 26) and the entire container of yogurt (Cal Count: 80, totaling 106) into the blender.  Blend well, once it is completely mixed and smooth (hence smoothie) pour it into your tall glass and enjoy!


YUM!!

Wednesday, November 30, 2011

Babycakes Donut Maker

Thank you Aunt Diane and Ava <3  I am so excited to make fun things in this.


This is the cutest mini doughnut maker, or should I say "donut" maker :P.  


As soon as finals are over I will try making cute doughnuts in this and let everyone know how they come out.


Any volunteer taste testers? :)

Monday, November 28, 2011

Tri-Color Cookie Recipe


Everyone loves Tri-Color cookies; but forget about the store bought cookies they just taste like flour.  You can make these yourself and they will be the best cookies you have ever had.

What You Need:
- 1 Box of Pound Cake (and any ingredients on the box)
- 1 oz. Bottle of Almond Extract
- Red and Green Food Coloring
- Apricot Preserves
- 1 Box of Baker's Semi-Sweet Chocolate 
- Three 11X7 Pans
- A Double Boiler or Chocolate Melter (I prefer the double boiler for these cookies)

Preheat: As directed by the box of pound cake

Start making these cookies by following the pound cake recipe.  Mix in half of the bottle of almond extract, this doesn't have to be perfect just approximately half.  Next separate the batter evenly into three different bowls, now you are going to color the batter.  One bowl will not be colored at all, one bowl will be red, and the last bowl will be green.


Spray each of your pans and coat them with flour before pouring one color in each pan.  Put the pans in the oven for 12 minutes.  While the cakes are in the oven cover the bottom of a cookie sheet in tin foil, this is where you will layer your cakes.  First take the green cake out of the pan and put it onto the foil covered cookie sheet.  Next coat the top of your green cake in a layer of apricot preserves, this should be a thin layer.  Then put your "white" cake for the next later, cover this layer in apricot preserves as well.  Some people prefer raspberry but I am not one of those people :P.  Finally layer the red cake on top (DO NOT PUT PRESERVES ON TOP OF THIS LAYER).


Next you will melt half of your chocolate (four squares if you are using Baker's).  Melt the chocolate in your double boiler.  Using a spatula spread the chocolate over the top of your layered cakes and on the sides.  Coat as much of the cakes as you can.  Now put the cake into the freezer for about 15 minutes or until the chocolate hardens.  After the chocolate has hardened you are going to flip the cake so you can coat the bottom of the cake.  Melt the remaining four squares and cover the rest of the cake.  


Before putting the cake back in the freezer use a knife to mark where you will cut.  If you outline your cutting marks before the chocolate is hard it will be easier for your to cut the cake later.  Only outline the marks, do not actually cut through the cake.  Place the cake back in the freezer until the chocolate is hard and then cut them into cookies.


YUM!

Sunday, November 27, 2011

Cake Making Essentials

The Fondant Embosser, also called a fondant ribbon cutter.


This tool helps you add the perfect detail to your fondant.


With this tool you can create straight symmetrical designs; for example, if you are making a ribbon on your cake this can add perfect detail to the ribbon.


Sorry for the poor quality of this picture but I'm a baker/law student not a photographer :P.  This is a fuzzy example of  what this tool can do, notice how the edges of the ribbon have a design on them. 

This tool has  two types of pieces: the ones that create the designs, and the spacers.  The spacers are marked and come into a variety of sizes so you can make sure your design is perfectly even and the exact size that you need.  

Tuesday, November 22, 2011

Sprinkle Cookies

First I would like to apologize for my awful photography skills, I'll work on the lighting and presentation but at least these taste delicious!


These cookies are great if you are in a rush but want something that looks like it took time.


Start with any sugar cookie recipe, I'll be posting my favorite recipe soon :).  Homemade and store bought dough will both work.  Set up a cookie sheet covered in foil or wax paper and pour sprinkles on it.  The cookie sheet will keep the sprinkles from being scattered onto your counter and make clean up easier.  Roll the dough into a log; as thick as you'd like, the thicker the log is the bigger the cookies will be.  If you bought pre-made dough this step is already done for you.  


Roll the log of cookie dough in the sprinkles making sure the sides are covered in sprinkles.  Now chill the sprinkle covered dough in the freezer for about ten minutes, this will make cutting the dough easier and allow the cookies to maintain their shape better.  Finally slice the dough into cookie slices before putting the cookies on a cookie sheet and into the oven.  Follow the baking instructions for the cookie dough.


Pouring any extra sprinkles back into their container will be easy because of the foil or wax paper you lined your cookie sheet with.

Ravani

Ravani is a delicious plain cake.  It looks very simple and is covered in syrup.


Cake Ingredients:
       1 lb. Butter
       2 Cups of Sugar
       12 Eggs
       2 Cups of Flour
       2 Tablespoons of double acting baking powder
       1 and 1/2 Cups of Farina (Cream of Wheat)


Syrup Ingredients:
       4 Cups of Sugar
       4 Cups of Water
       1 Tablespoon of Vanilla


Preheat the oven to 350


In a large bowl beat the butter until it is fluffy.  Gradually add the sugar whiling beating the mixture.  Next add the eggs one at a time and beat on a low speed between each addition.  Now sift the flour and the baking powder together before adding them to the mixture.  Then add the farina (cream of wheat) and mix the batter until it begins to thicken.  Grease an 11 X 17 inch cake pan before pouring the mixture into it.  Make sure the batter is spread evenly in the pan.  Bake for 40-45 minutes.


While the cake is baking you can begin to make the syrup.  In a saucepan mix the sugar, water, and vanilla.  Bring this mixture to a boil and allow it to simmer for 40 minutes.


When the cake is done baking pour the hot syrup over it (I recommend using a ladle for this part).  Keep the cake in its cake pan and cover it with foil.  Allow the cake to cool, after cooling cut the cake and enjoy! :).

Sunday, November 20, 2011

Give the Gift of Cookies

This Christmas give the gift of cookies, when done correctly this will be your friend's favorite gift.  These are great for people you want to get a small something for without breaking your bank.  


First make any kind of cookie you like, I chose sugar cookies. 


Second pick a cute Christmas themed container, it can be a box, tin, or bag.  Check out your local craft stores for these or try Wilton.  Keep in mind that the small boxes still hold a lot of cookies so don't pick too big of a container.


Finally arrange the cookies in the container to be aesthetically pleasing, note the pretty snowflake cookie is placed on top of the less decorated cookies.  This part is about presentation, but once they open it the only thing that matters is how great they taste.

Friday, November 18, 2011

Candy Cane Cookies

These cookies are simple and delicious.


Ingredients:
      2/3 Cup of Butter
      3/4 Cup of Sugar
      1 Egg
      1 Teaspoon Vanilla Extract
      2 Cups of Flour
      1 and 1/2 Teaspoons of Baking Powder
      4 Tablespoons of Milk
      A Pinch of Salt


Preheat Oven to 375


First mix the sugar, flour, baking powder, and salt together.  Then mix in the butter and egg.  MIX BY HAND!  Then add the milk.  Next split the dough in half, one side will get red food coloring mixed into it.  Refrigerate both halves for 30 minutes.  Finally roll pieces of the dough in your hands to create "snakes", wrap two snakes (of different colors) together and add the hook before placing on the cookie sheet.  Bake for 7-10 minutes.


If the dough starts sticking to your hands either use flour or put the dough back into the refrigerator. 

Homemade Marshmallow Fondant

Marshmallow Fondant Recipe  The results of my poll show that marshmallow fondant is the winner (even if the poll only had 8 votes) 


                                               Example of marshmallow fondant -->


Okay so I finally tried this recipe, and I LOVE IT.  I found that this is noticeably different than Wilton's fondant, but in a good way.  It is easier to work with and can be stretched thinner.


However there are a few changes that I would suggest:


- Even if the marshmallows look melted put them in for a total of 2 1/2 minutes (stirring after every 30 seconds of course)
- Use only 1 lb of confectioner's sugar (there is no need for the second pound and you can pour the entire pound in at once.
- Finally this doesn't take an hour, it's closer to 20 minutes


I'll update further once I use it on a cake.

Soft Caramels

Soft-Caramels Mmm, this is my weakness...I'll try this recipe, I hope it's good!

Spiral Sugar Cookies

Sprinkle Bakes' Spiral Sprinkle Cookies Simple, quick, cute, and delicious :P yum!

Flower Candy Dish

Wilton's Plant-a-Sweet-Surprise-Candy  These cute candy dishes can hold your favorite candy and when you run out of candy to put into it, you can eat the dish :).

Pie Cookies


Sweet Sugarbelle's Thanksgiving pie themed cookies, this is my kind of pie!

Cupcake Cookies

Sweet Sugarebelle's cupcake cookies.


These will take a lot of time, but they are so cute its worth it.

Cute Cookies


The Crafty Penguins's cupcake cookies :P

Panda Bread

Perfect Panda gives step by step instructions for making this loaf of panda bear bread.  This bread is so cute I just want to eat it up, but I'll have to make it first :P.

Chocolate Covered Oreos

 Sugared Blog's decorated 
    Oreos.  I will be making these 
    over my winter break they 
    are too cute! 

Wedding Cake Pops

Bakerella's Wedding Cake Pop


Cute and delicious <3

Truffles

Cookie Dough Truffles

    I have already made these but
    they are so easy and quick 
    they are always on my list.


Sundae Surprise

Wilton's Sundae Surprise Candy Dish.


Chocolate holding chocolate? WIN! 

Bake It In A Cake


Bake It In A Cake


What can I say other than I NEED to make this <3  

Thursday, November 17, 2011

Cake Making Essentials

Hey guys :),


In order to make amazing and cute cakes you are going to need the right tools.  Unfortunately all of those tools can start to get very expensive, not to mention you only have a limited amount of space to store everything.  


Wilton's Mini Stand-Up Bear pan is essential.  First it is extremely easy to use and can create 3D bears.  That's great, but that's not all.  I used this mold to make the Max and Ruby figures on my Max and Ruby Cake.  My next cake is going to be a Mickey and Minnie Mouse cake which will also have figures made from this mold. 


The advantages of using this mold include having cake figures rather than gum paste or fondant figures.  The cake figures taste better and make your cake go farther with the party guests.


How to transform the bear into Max and Ruby:
                     First you bake the bear following the directions on the box.  After you have let the bear cool you can start to transform it by carefully shaving off unneeded pieces.  These pieces include their ears and snouts.  The rest of the bear will be covered in frosting and fondant so you do not have to worry about their arms or feet but save the fondant and frosting for last.  Carefully shave the ears and snout off so that their heads are round.  Using any extra cake (it must have already been baked and can include the pieces that you shaved off of the bears) make crumbs and mix them with small amount of frosting as if you were making a cake pop because that is what the ears will be made out of.  Shape bunny ears out of your cake pop mixture, melt chocolate, dip a stick into the chocolate and then into the individual ear, let that cool before dipping the ear in chocolate because that will be done later.  Now dunk the bear's head into melted chocolate and fully cover his head, you shouldn't have too many drips if your chocolate is the right temperature.  If it does drip a lot it means your chocolate is too hot but don't worry because you will be covering the bears's body anyway.  Before the bear's newly chocolate covered head hardens you want to dip your bunny ears into the chocolate so that you can get the stick into the bear's head.  Do not worry about pushing the stick all the way in until it is dry.  This allows you to get the ears on easily and it holds the ear so it can dry without being placed on a flat surface.  Now decorate to your hearts content with frosting, fondant, and edible markers.

Tuesday, November 15, 2011

CONTEST!

Hey guys :)

       So I really want to start getting a lot of followers, so lucky for you I am going to bribe you guys.  Here's the deal, I want to get at least 30 followers by December 31, 2011.  If I have at least 30 followers I will randomly pick one and bake them something special from my blog.  :)  The only catch is that I am not going to tell you what the prize is until I announce the winner, but I can promise you it will be delicious and that it is already on my blog so you can't lose.  I'll pick the winner on January 1st, 2012 if we meet my goal :).  Thanks everyone!


Sunday, November 13, 2011

Turkey Brownies


I got the idea for these from Erica's Sweet Tooth but I made a few changes :)

How To:
       1) Bake a box of brownie mix in a 13x9 pan
       2) Roll the baked brownies into balls, this is easiest when
           they are still warm, only make the bodies
       3) Instead of dipping them in chocolate I dipped them in
           melted chocolate frosting 
       4) Next I stuck a whopper onto the frosting coated body
       5) Stick 3 candy corns behind the turkey's head
       6) Now let the frosting cool and harden before decorating the
           faces :)
       7) The faces are really easy, pipe on short lines of vanilla
            frosting for the eyes and using a black decorating gel
            place a dot of black on each eye, try to keep them from
            being cross eyed if you can :P.
8) I made their beaks out of yellow fondant, mold the fondant into a beak shape, dab the side that will be attached to the whopper with
    a small bit of water and stick the beak to the whopper.
9) Share with family and friends !